I was involved with a remake of one of my old game in unity (suspense). And i came across making simple car in blender, and realized the best way is to model some cars or finding a car model online. After some failed searches i decided to make my own car in Blender. Its been a Long time since i interacted with blender. So after a couple of tutorials and stuffs i made one car, which can be modified into several models for my game. So i decided to share with you how it is made. I’m not a 3D expert (or blender expert).
Word of Caution : As one reddit user has pointed out, this tutorial is an inefficient way of creating low poly asset for games. So please proceed with caution. Or wait for me to update the tutorial with optimizations.
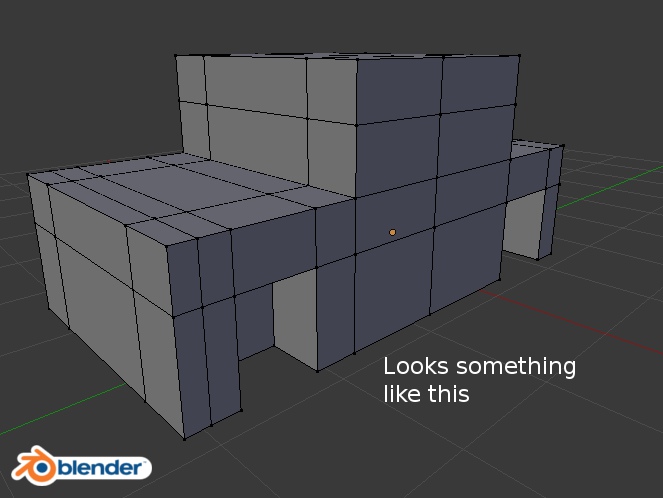
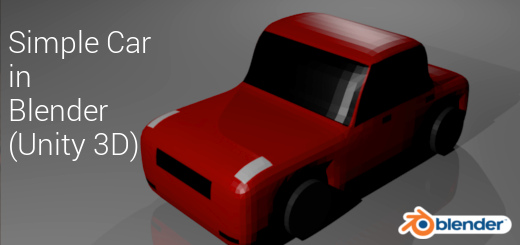
Here is the pic of Car we are going to make. Looks Boxy and stuff, but can be made smooth later…
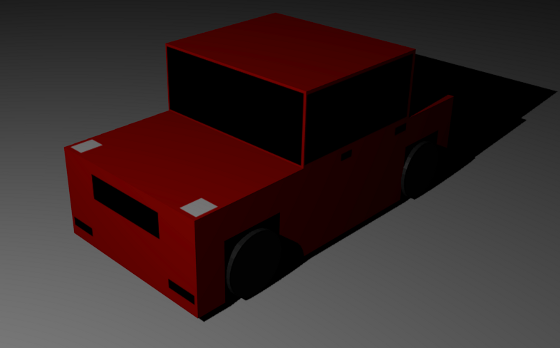
Making a Simple Car in Blender
First i made a simple blueprint on the notebook. It looks like this.
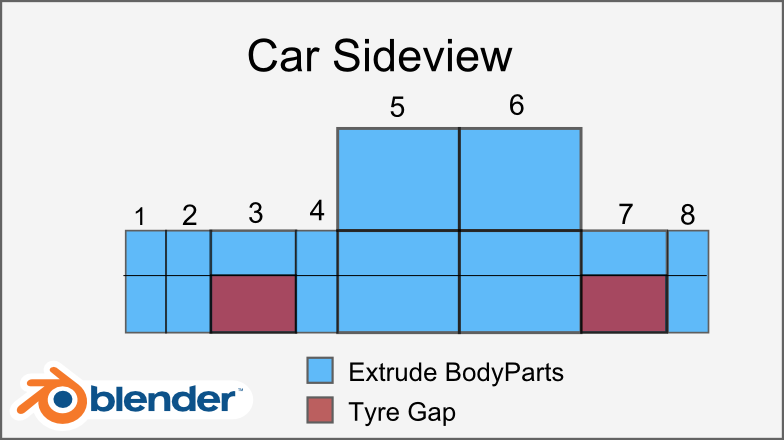
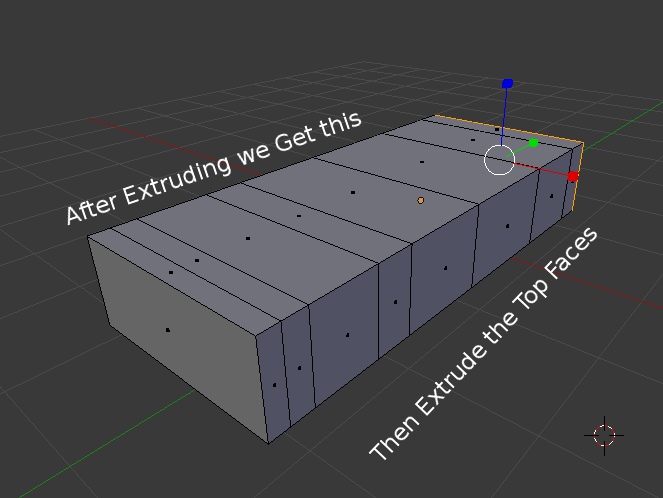
Then in Blender i started with a Cube. You can make 8 segments and 2 segments length & breadth wise and modify it in edit mode later or Extrude the faces of the box as given below. I did that way since in the new version i couldn’t find the segments dialog.
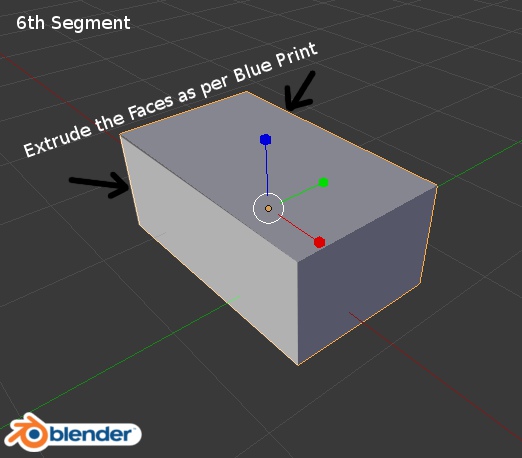
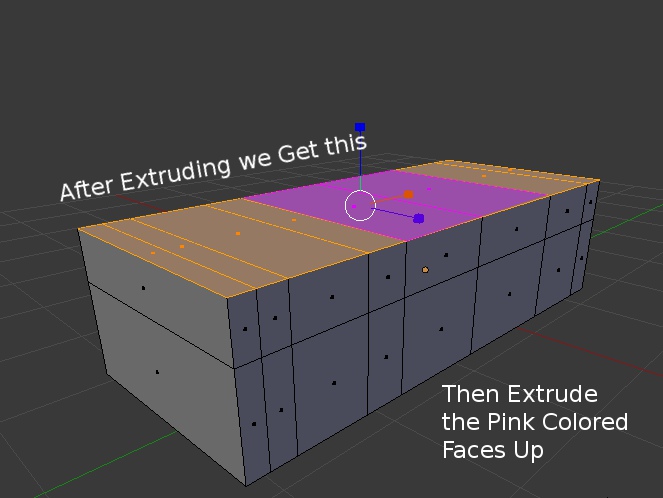
Now Extrude the Top Faces to get the Windshield parts.
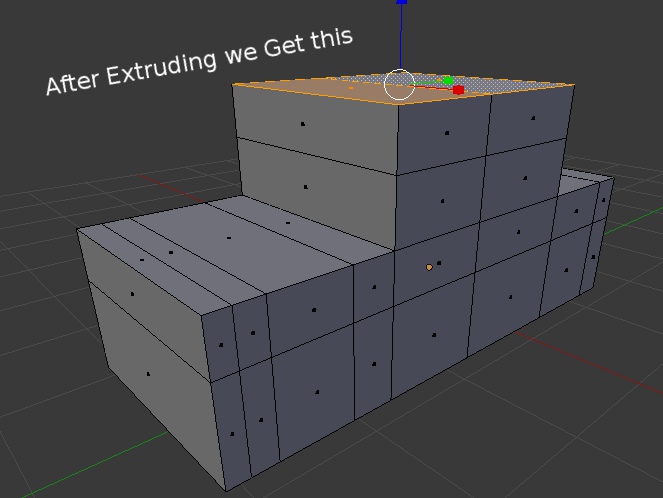
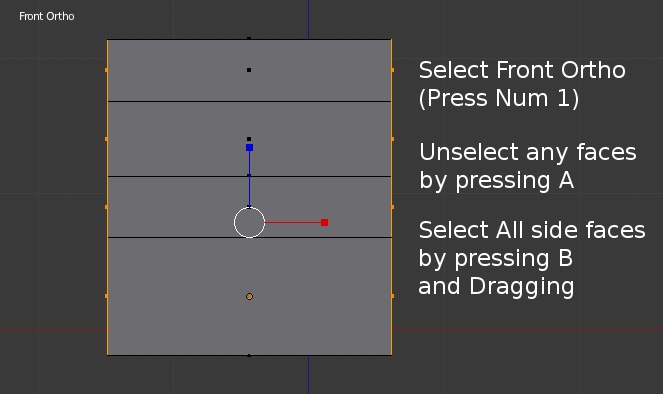
Now Select all the Side Faces. (Make sure to turn off ‘limit selection to visible faces’ button)
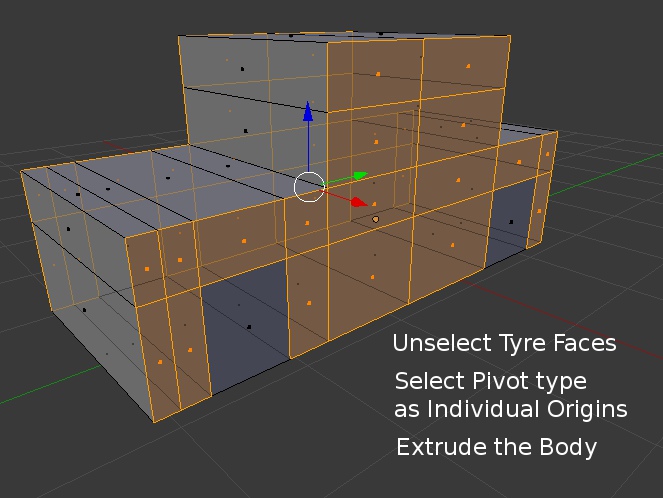
Now Unselect the Tyre Faces.
Change the pivot mode or extrude might behave weirdly. And Extrude. Now we have a gap for placing the Tyres.
Texturing
For this we Unwrap the Car, sort of like taking apart pieces of car and painting it.
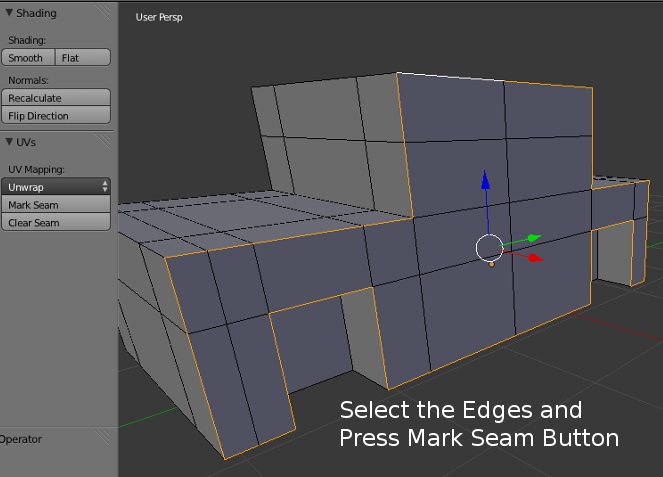
We divide the car into the Side Faces, and Top Faces (from front bonnet to Rear Bonnet of the Car).
Now do the same with Top Face. (Bottom Faces will automatically be left out).
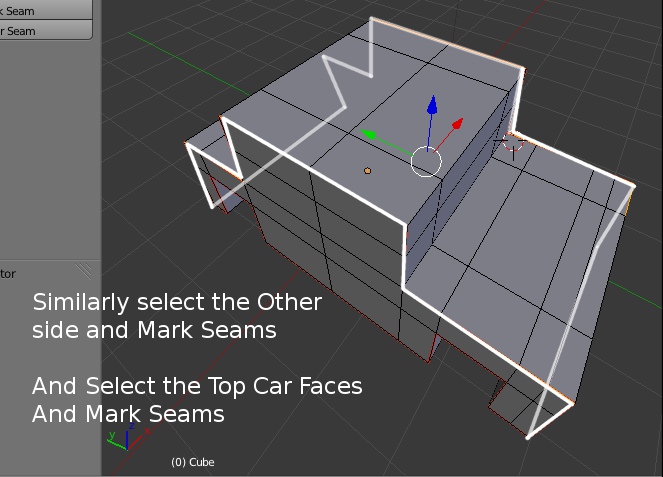
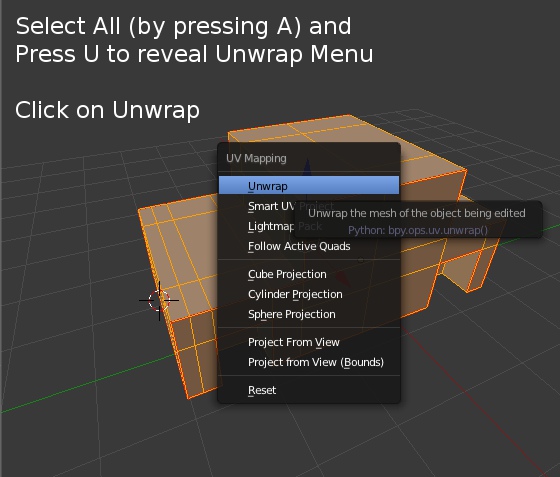
Now Select all Faces, and Press U and select Unwrap.
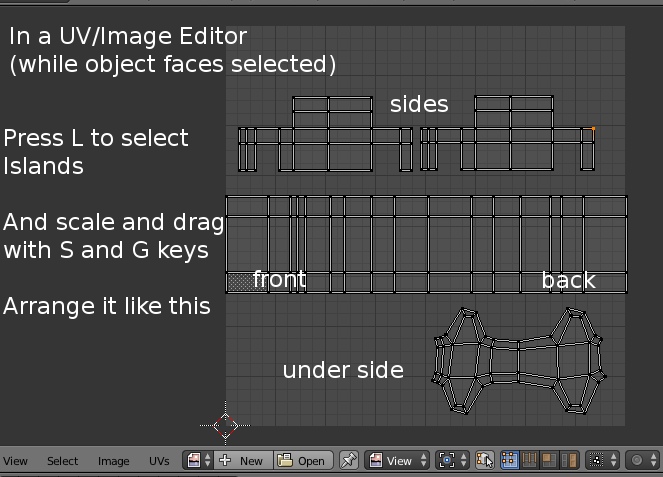
Choose any view as UV/Image Editor to view the unwrapped faces.
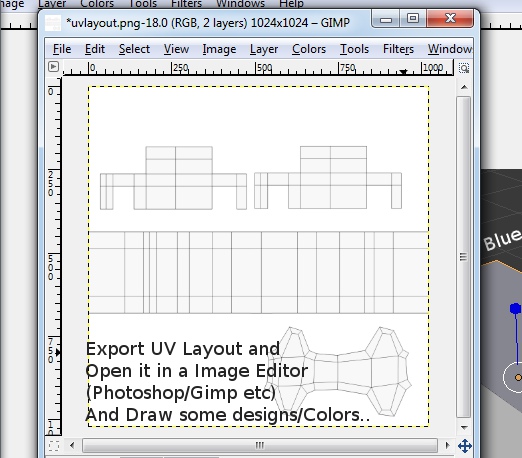
Now to add Texture, we export his layout by choosing UV Menu>Export UV Layout and exporting it as a PNG file. We open that file in a image editor.
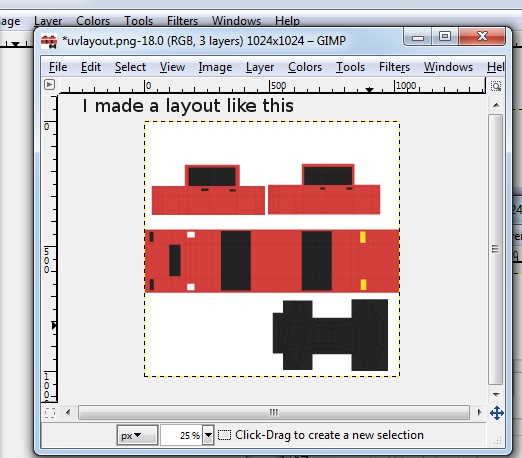
Color the car body parts, draw headlights , backlights etc etc…
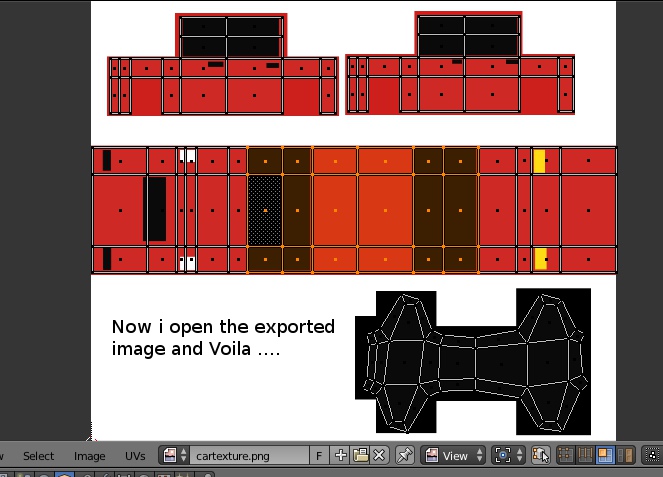
Save the Colored Texture as an image like CarTexture.png. In Blender UV editor, press open and select this image file.
To make it appear on the Car, add a new material to it and add the previous texture to it.
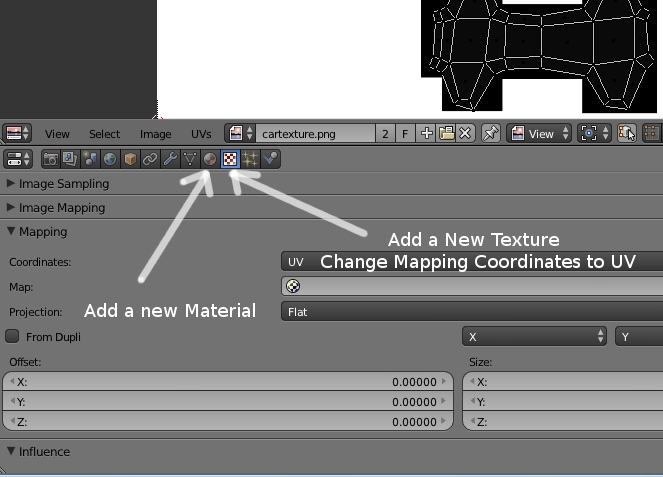
Add some wheels and Press F12 and voila.. Car is ready.
In Edit mode Move and adjust vertices to make various models of cars.
Now Just import them into unity3D and Unity will make an FBX file from it automatically. Add the Texture to it and it will appear just like that in Blender.
Add a Subdivision modifier to smooth it. Just for the sake of rendering with smooth edges, not for actual gaming uses.. And add some fancy materials …
Hope this tutorial might be helpful to you. I haven’t covered much in detail, but feel free to comment your doubts & comments.

