Inkscape 1.0 badge tutorial – Video + Text Guide
Here’s the Inkscape Badge Tutorial No One asked for, but I decided to do it anyway with my voice. Maybe it’ll help someone.
Video Notes / Written Tutorial
For those not preferring a video tutorial, here’s a written one.
- selecting the color palette to windows xp

- Drawing a Rectangle and Duplicate it (CTRL + D) and change the color. Scale it down to this size.

- Click again. Skew it.

- Move it back with PAGE DOWN key
- Now create another copy. Change its color and size and place it back to the two shapes.

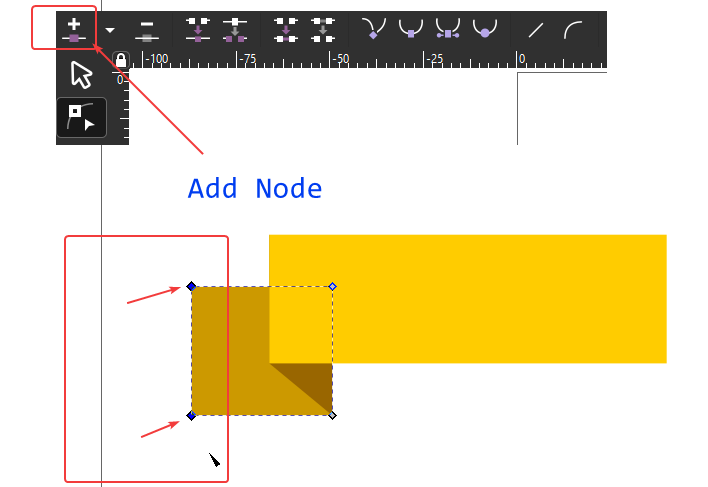
- convert it to path by PATH -> Object to Path Menu. And Double Click on it.
- Select left 2 nodes. Click on ADD NODE button on the top menu.
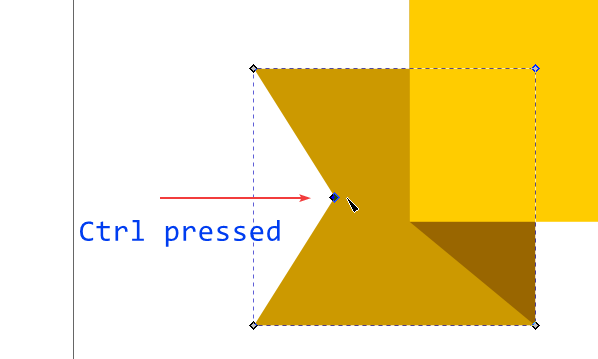
- Now select and drag the center node to right with control key pressed (constrain horizontal)
- Now select both the added pieces. Duplicate them (Ctrl + D). Move to right most part.
- Flip Horizontally by pressing H key. Move it back by Page Down twice

- Voila. Our Badge is Ready
Let Me know if you have any queries in the comments below.